Creating a basic viewer
In this section we will create a viewer application.
Background
The central object in the architecture of the Boundless SDK is the viewer (gxp.Viewer). Primarily, a viewer combines a map panel with tools, but it can do much more.
The main configuration options for a gxp.Viewer are:
| Option | Description |
|---|---|
proxy |
Sets the proxy to use in order to bypass the Same Origin Policy when accessing remote resources through JavaScript. Only needed when external resources (as in, from outside the OpenGeo Suite instance that your app lives in) are used. Will be set as OpenLayers.ProxyHost. |
portalItems |
The items to add to the portal, in addition to the map panel that the viewer will create automatically. |
portalConfig |
Configuration object for the wrapping container (usually an Ext.Viewport) of the viewer |
tools |
A set of tools that you want to use in the application, such as measure tools or a layer tree |
mapItems |
Any items to be added to the map panel, such as a zoom slider |
sources |
Configuration of layer sources available to the viewer, such as MapQuest or a WMS server |
map |
The configuration for the actual map part of the viewer, such as projection, layers, center and zoom |
We will see many of these options in the following sections.
By default a viewer will fill up the whole viewport.
Setting up a new project
We will use the suite-sdk script to set up a new viewer application called
“myviewer”.
Note
For more information on the suite-sdk script, please see the section on Creating and deploying apps with Boundless SDK.
Run the following command, replacing path/to/myviewer with the desired name of and path to your application:
suite-sdk create /path/to/myviewer gxp
This will generate a template application using the gxp template. Now run the following command:
suite-sdk debug /path/to/myviewer
The application will now run in debug mode on port 9080 of the local machine. Now start up a browser, and type in the address of the application (such as http://localhost:9080/:
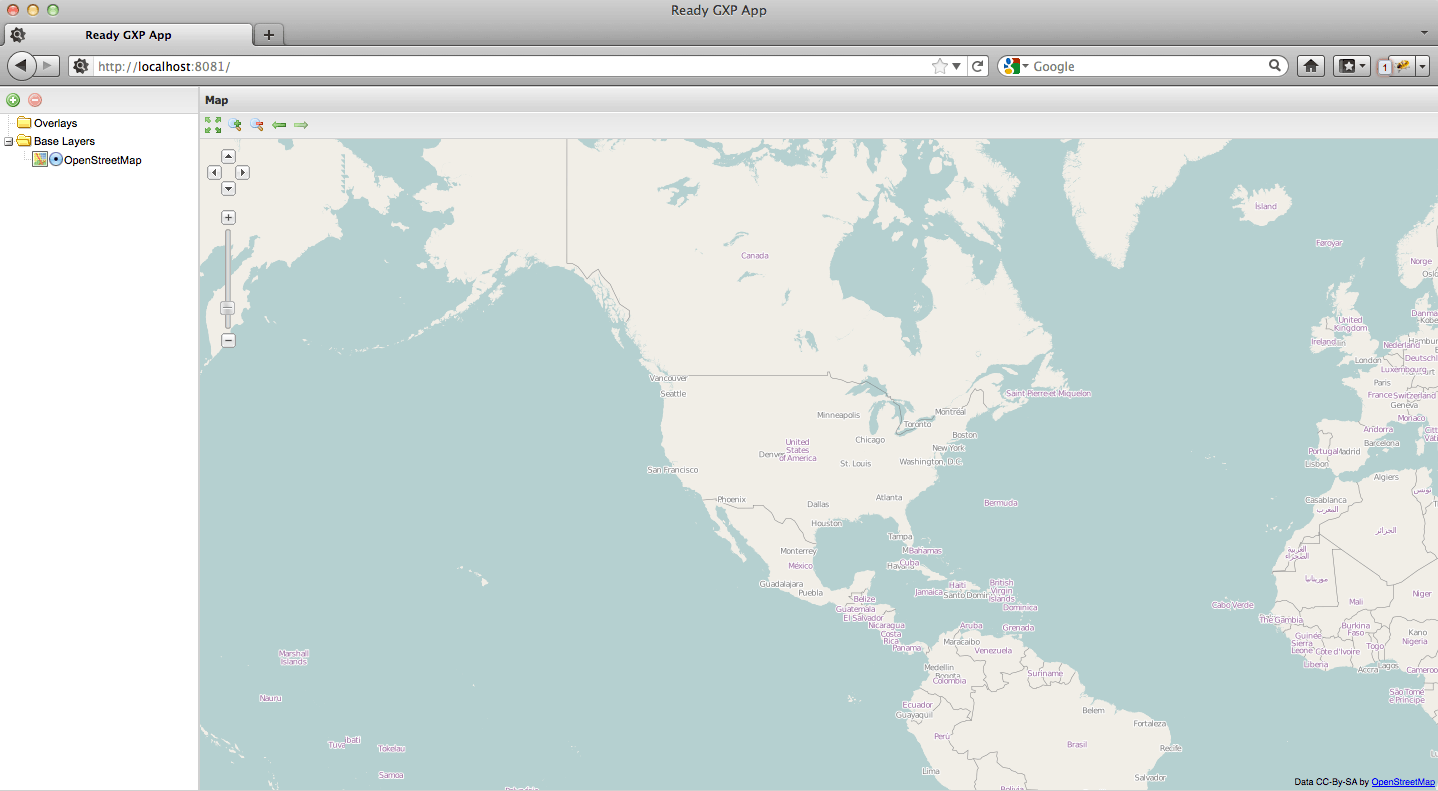
What you get is a basic web mapping application which contains a layer tree, a map panel and some map tools. The map panel contains an OpenStreetMap base layer.
Note
If you want to run on a different port, specify it with the -l flag (for example: suite-sdk debug -l 9090 /path/to/myviewer).
Dissecting the application
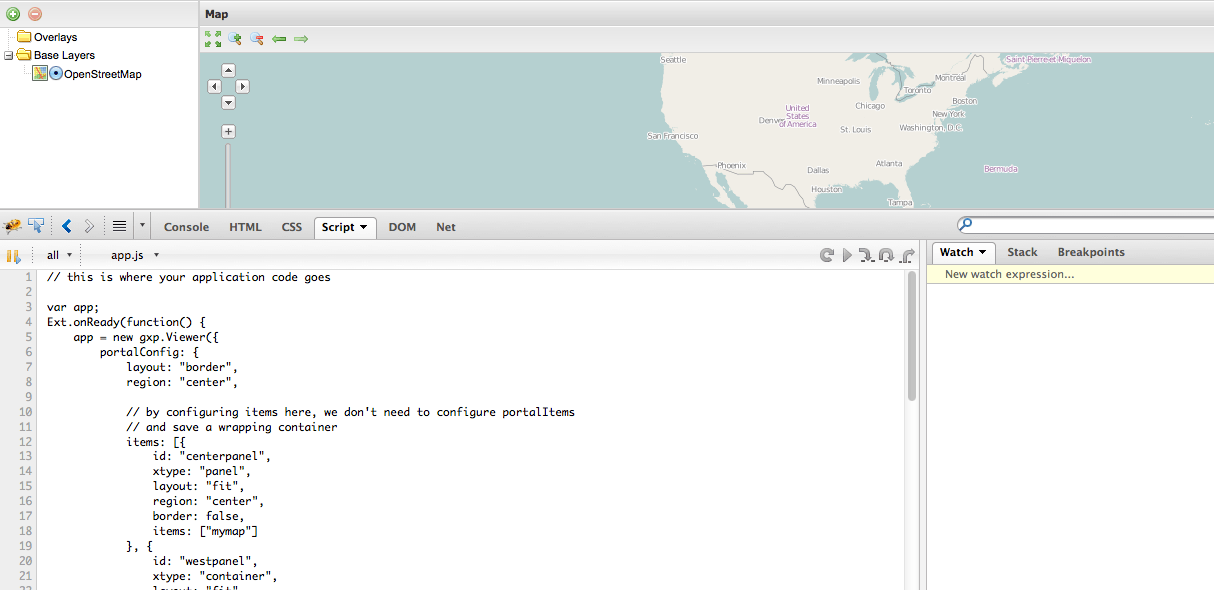
To examine how this project was set up, use your browser’s debugging tool (Chrome/Safari Developer Tools, Firebug in Firefox, or equivalent). Select the Script tab and look for the file app.js.
Note
You’re looking for the second instance of app.js in the Scripts list; the first one is the loader file.
Dependency management
The app.js file can be found in /src/app/ from the root of your application.
The first thing to see in app.js is the list of JavaScript dependencies that are required to run the application. Whenever you add a component to the application, be sure to add a line to this file with the relative path to the file it is defined in, using the following pattern:
* @require path/to/Dependency.js
Everything listed here will be pulled in by the application build tool. The result is a small application footprint, because only the required components are included in the build.
Note
Whenever you add dependencies to app.js, the debug server will need to be restarted. To do so, go to the console where you ran suite-sdk, hit Ctrl+C, and run the suite-sdk debug command again as above.
Application details
In the example application, the main component (gxp.Viewer) is created with a single configuration object, exposing a single global variable named app.
The gxp.Viewer instance is configured to create a viewport filled with a border layout, which has two items, a container in the ‘west’ region 200 pixels wide, and the map in the ‘center’ region. Please note that all tools in the Boundless SDK are Ext plugins, so they can be created with a ptype shortcut in the config, similar to the xtype shortcut for Ext components. This viewer application defines the following tools:
- A Layer Tree, which will be rendered in the ‘west’ panel defined in the portalConfig.
- The Add Layers tool, a button that, when clicked, creates a dialog to add new layers to the map. This tool will be part of the top toolbar of the layer tree.
- The Remove Layer tool, which will be shown both in the top toolbar of the layer tree and in the context menu of the layer tree. This tool can be used to remove a layer from the map.
- The Zoom to Extent tool, which will be shown in the top toolbar of the map. This can be used to zoom to the maximum extent of the map.
- The Zoom tool, which will create two buttons in the map top toolbar, to zoom in and zoom out with a factor 2 centered on the current map center.
- The Navigation History tool, which will create two buttons in the map’s top toolbar, to navigate through visited map extents.
The viewer configuration defines two layer sources, a WMS-C (cacheable WMS) source to a local GeoServer (with the embedded GeoWebCache), and an OpenStreetMap source. Layer sources are also implemented as Ext plugins, so configured with a ptype. The configuration for the map defines the initial map extent (centered on the USA) and the layers to load in the map, in this case an OSM base layer and the usa:states layer from an OpenGeo Suite’s default GeoServer setup. (See Proxying GeoServer for how to link this application to a GeoServer instance.) Finally, a zoom slider is defined. Note that this can also be done using mapItems.
Proxying GeoServer
By default, your application will proxy a GeoServer to the relative path of /geoserver if one is found at http://localhost:8080/geoserver. Otherwise, a GeoServer instance will not be accessible by default unless you add the -g option to the debug command. This will proxy a remote GeoServer, or just one running on a different port. If you have a GeoServer instance running locally on port 7000, use the following command:
suite-sdk debug -g http://localhost:7000/geoserver /path/to/myviewer
To proxy a remote GeoServer, simply replace the URL with the location of the remote GeoServer instance:
suite-sdk debug -g http://demo.opengeo.org/geoserver /path/to/myviewer
The commands above will allow GeoServer to be accessible to the application at the relative path of /geoserver.
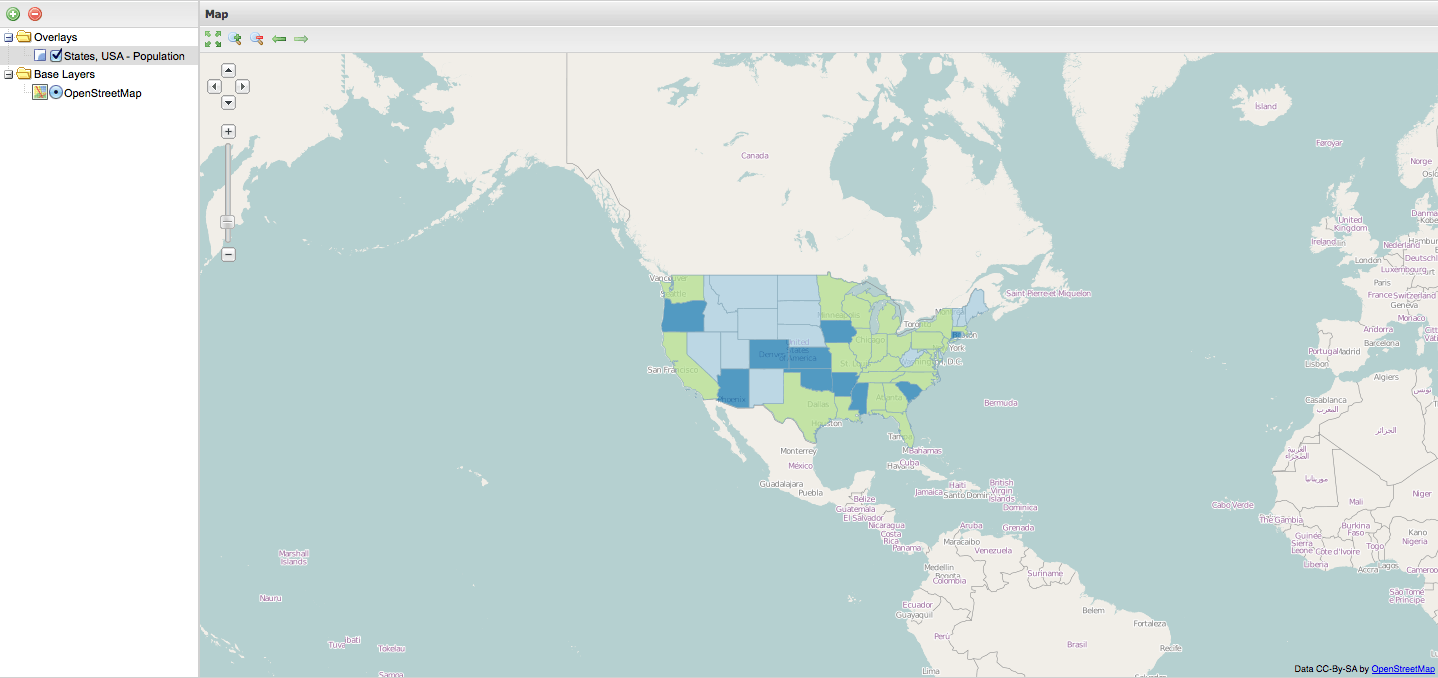
Application with a GeoServer proxy showing usa:states layer
Note
Pressing Ctrl-C in the terminal will shut down the server and allow the new command to be issued.